
How to Make a Haunted TV for Halloween

Turn almost any television into a haunted Halloween display — from a modern flatscreen that suddenly glitches and reveals a ghost, to an old CRT filled with creepy static.
Time: ~10–30 min · Difficulty: Easy–Intermediate · Cost: Low
What you'll need
For the easiest setup:
A USB memory stick
A looping Haunted TV video
If your TV doesn't play video from USB, you'll also need:
An external media player
An HDMI cable
Using an old analog CRT? You'll need a few extra components — we'll cover that setup further down.
Option 1 — The Quickest Setup: Play Directly From Your TV
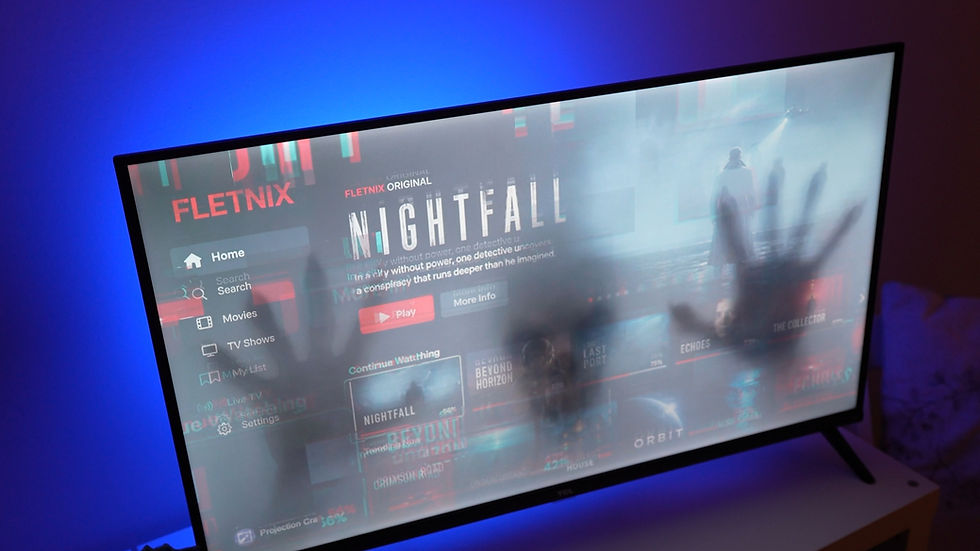
What you'll need
A modern television with USB video playback
A USB memory stick
Your Haunted TV video
If you’re using a ProjectionCraft Haunted TV pack and simply want the complete effect running automatically, use the Full Loop file.
Step 1 — Copy the video to your USB stick
Download your files and locate the complete Haunted TV loop.
Copy the video onto a USB memory stick.

You don't need to copy every file from the pack unless you intend to build your own sequence.
Step 2 — Connect the USB stick

Insert the USB drive into the television's USB port.
Most modern TVs will either detect the drive automatically or allow you to access it through the TV's Input, Source or Media menu.
The exact wording varies between manufacturers.
Step 3 — Open the video
Open the television's media player and select the Haunted TV video.
Press play.

Step 4 — Turn on looping
Find your television's playback settings and choose:
Loop
Repeat
or
Repeat One

The wording varies between TVs, but the principle is the same.
Your Haunted TV should now play continuously.
For a Halloween party or trick-or-treat night, you can simply leave it running.
Playing Several Haunted TV Clips
ProjectionCraft Haunted TV packs also include separate effects that can be combined into your own sequence.
If your television supports playlists or multiple-file playback, place the clips you want on the USB stick and select Repeat All or the equivalent option.
However, there is one potential problem.
The Transport-Bar Problem
Many built-in television media players display information every time a new video begins.

You might see:
The filename
A playback symbol
A progress bar
The video duration
A loading icon
That instantly breaks the illusion.
If you're using one complete Full Loop video, this often isn't an issue because the interface only appears when the video initially starts.
If you're running several separate clips, however, the TV may display its interface between every file.
The easiest solution is to use a dedicated media player.
Option 2 — Use an External Media Player
What you'll need
Your TV
A USB memory stick
A dedicated media player
An HDMI cable
Your Haunted TV files
This is also the best option if your television doesn't support USB video playback.
Step 1 — Load your files
Copy your Haunted TV videos onto the USB memory stick and insert it into the media player.

Step 2 — Connect the media player
Connect the media player to your television using HDMI.
You should normally have three connections:

Power → Media player
USB stick → Media player
HDMI → Television
Step 3 — Select the HDMI input
Turn on the TV and choose the HDMI input connected to your media player.
You should now see the media player's menu.

Step 4 — Play the videos
Open the Videos section and select your Haunted TV files.
If you want the haunting to continue automatically, open the player's playback settings and choose a continuous or sequential loop mode.
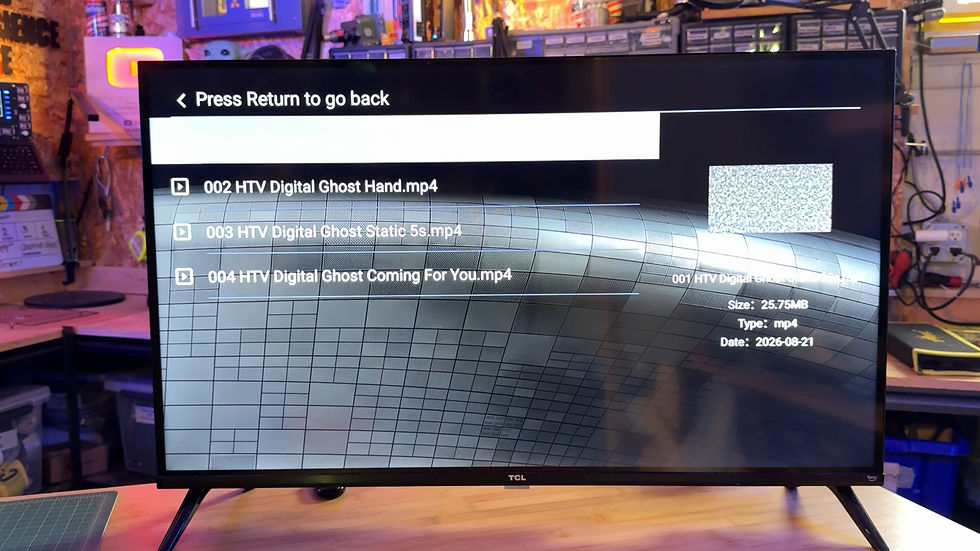
A dedicated player generally gives you much cleaner playback than the media player built into a television.
This becomes especially useful when creating longer sequences from several files.
Which Haunted TV Pack Should I Use?
ProjectionCraft currently has two Haunted TV styles.
Haunted TV: Digital Horrors
Best for:
Modern flatscreen televisions
Computer monitors
Digital displays
Contemporary rooms

Digital Horrors uses corrupted digital signals, glitches and interference as the ghost begins breaking through the screen.
You can run the complete sequence or combine the individual ghost clips, static beds and transitions to create your own haunting.
Haunted TV: Retro Static
Best for:
CRT televisions
Vintage television displays
Retro horror scenes
Old workshops, laboratories and abandoned-room setups

Retro Static is designed around traditional television interference and analog-style static.
Option 3 — Using an Old Analog CRT Television
Using a genuine CRT can create an incredibly convincing Haunted TV because the screen itself already has the character of an old horror movie.
There is one complication:
Very old televisions may not have HDMI, composite video or any other modern input.
Some have nothing more than an antenna connection.
To use one of these televisions, you need to convert the signal.
What you'll need
An old analog television
USB memory stick
Digital media player
RF converter
Antenna/coaxial cable
Antenna transformer if your TV uses screw terminals
The basic signal path is:
USB Stick → Media Player → RF Converter → Television
Step 1 — Connect the television to the RF converter
If your television has a coaxial antenna input, connect the RF converter directly using an antenna cable.

Older televisions may instead have two screw terminals marked VHF.
For these televisions, attach a small antenna transformer to the cable and connect it to the VHF terminals.
Step 2 — Connect the media player
Connect the video output from your digital media player to the RF converter.
The converter turns the modern video signal into something the analog television can receive.

Step 3 — Turn on the television
Old CRT televisions may take several seconds to warm up.
Once the screen appears, tune the television to the channel being generated by your RF converter.
You should see your media player's output.
From here, playback works exactly as it does with a modern television.
Select your Haunted TV file and set it to loop.
Important CRT Safety
You do not need to open the television to create this effect.
Old CRT televisions can contain dangerously high voltages even when unplugged. Keep the television intact and make all connections using its external antenna or video inputs.
If the television requires internal repair, leave that work to someone experienced with CRT electronics.
Make the Television Part of a Scene
A convincing Haunted TV isn't just about what happens on the screen.
The environment around it can completely change the effect.
For a retro television, try building a story around the TV.

For example:
Put it on an old workbench
Add electronic components
Scatter tools around it
Add notebooks or strange observations
Run cables across the table
Add subtle atmospheric lighting
Instead of looking like a Halloween video playing on a television, it starts to look like something has happened to the television.
For a modern digital haunt, the opposite can work extremely well.
Place the television in a completely ordinary living room.
The more normal everything feels, the more surprising it becomes when the signal begins to break down.
Upgrade the Sound
Sound is one of the easiest ways to make the scare more convincing.
If the TV speakers aren't powerful enough, connect an external speaker to your television or media player.
A small powered speaker is usually plenty.
Hide it near the television so the sound still appears to be coming from the screen.
The combination of static, sudden audio and an unexpected apparition can make a relatively simple visual effect dramatically more effective.
Add Lighting and Atmosphere
Once everything is playing correctly, finish the environment with subtle lighting.
Try:
A dim accent light behind or beside the television
Flickering practical lighting
Colored light spilling into the room
Very light atmospheric haze where appropriate
Don't over-light the screen itself. The television should remain one of the brightest objects in the scene.

The Simplest Haunted TV Setup
If you just want the fastest possible setup, use:
TV + USB Stick + Full Loop
Copy the file.
Plug it in.
Press play.
Turn on repeat.
Done.
If your television displays unwanted menus or you want to combine several clips:
TV + Media Player + USB Stick
And if you want the full retro horror version:
CRT + RF Converter + Media Player + USB Stick
Recommended Kit:
NEUMI Atom - Media Player - https://amzn.to/4qMNdSA
RF Converter - https://amzn.to/3V3dD6A
HDMI Cable - https://amzn.to/4yarJ4y
USB Drive - https://amzn.to/4ilqET1
COAX Cable - https://amzn.to/4x1lHSO
COAX to SPADE Transformer - https://amzn.to/4ydHyYn
Speaker - https://amzn.to/4i2C7qq
Mini Jack Cable - https://amzn.to/46x4Axk
Mini Jack to Phono Cable - https://amzn.to/4zMZOJo
Once you have the basic setup working, you can take it one step further by making the haunting interactive.
Instead of having the jump scare happen randomly, you can trigger it when someone approaches the television.
NEXT GUIDE → How to Build a Motion-Triggered Jump Scare

Comments